Todo App In Angular Using Local Storage
Introduction
In this article, we will create a simple Todo application in angular using local storage. This app will give functionality like adding Tasks, Mark Task Complete, and Deleting single or All tasks from the list.

What Is Local Storage?
Local Storage is a data storage type of web storage. This allows the JavaScript sites and apps to store and access the data without expiration. This means that the data will always be persisted and will not expire. So, data stored in the browser will be available even after closing the browser window. In short, the localStorage holds the data with no expiry date, which is available to the user even after closing the browser window.
Local Storage Methods
- setItem()
This method adds the data through key and value to localStorage. - getItem()
It is used to fetch or retrieve the value from the storage using the key. - removeItem()
It removes an item from storage by the key. - clear()
It is used to clear all the storage.
Create Angular Application
Create a new angular application by the following command.
ng new <AppName>For this todo application, I will use ngModel to pass data between the HTML file and the ts file. To use this directive, we must import FormsModule in the import array of the app module.
import { NgModule } from '@angular/core';
import { FormsModule } from '@angular/forms';
import { BrowserModule } from '@angular/platform-browser';
import { AppComponent } from './app.component';
@NgModule({
  declarations: [
    AppComponent
  ],
  imports: [
    BrowserModule,
    FormsModule,
  ],
  providers: [],
  bootstrap: [AppComponent]
})
export class AppModule { }
Here I’m using bootstrap for designing. Please refer to this article if you want to know how to add bootstrap in Angular.
What We Are Going to Do
- First, we define an array in which we will push data that the user entered.
- When the application loads for the first time, we will get data from local storage and initialize the list variable in the ngOnInit method.
- For handling the user’s input, we bind the variable name task with ngModel.
- When the user clicks on the add button, add that task in an object with completed status false and push that object into local storage.
- For the change status task, we will get that object by index and change the current status.
- Same for delete, we will remove that object from the list by index. And for deleting all, we are to initialize an empty array to list variables.
As seen in the image below, data will be stored in this format in local storage.
Save Function
- For storing a list in local storage, pass that list by converting it to a string by JSON.stringify method into the local storage setItem method.
- If we want to update data in this local storage, we have to pass a new list of tasks with the same key name which is here todo. So we call this method whenever we add, delete, or update a task.
Save() {
   localStorage.setItem("todo", JSON.stringify(this.list));
}
Get Function
- In this function, we get value from localStorage by the getItem method and assign it to a variable named value.
- Then checks that we are getting value from local storage. If the key does not exist in local storage, it will return an empty string.
- If the value is not empty, assign the value to the list variable by parsing the value.
GetAll() {
  let value = localStorage.getItem("todo");
  if (value != '' && value != null && typeof value != "undefined") {
    this.list = JSON.parse(value!);
  }
}
Add Function
- In add function, we are accessing the user’s input by task variable, which is used with ngModel on the HTML side.
- Then create a new object which has two properties TaskName and IsCompleted. We will pass false while adding a new task in IsCompleted and a task in the TaskName property.
- Then push this object into the list array. And call the save function, which stores this list in local storage.
- In the last clear value of the task variable, so the user’s textbox gets clear.
Add() {
  let obj = {
    TaskName: this.task,
    IsComplete: false
  };
  this.list.push(obj);
  this.Save();
  this.task = '';
}
Delete and Delete All Function
- In the delete function, we pass the array index from the HTML side.
- First, check that index’s value is less than the length of the array
- Then remove that item from the array using the splice method by passing an index and number of elements to remove from it.
- Then call the save function to update data in local storage.
- For deleting all, we will reinitialize the array with an empty array and call the save function.
Delete(index: number) {
  if (this.list.length > index) {
    this.list.splice(index, 1);
    this.Save();
  }
}

DeleteAll() {
  this.list = [];
  this.Save();
}
Change Status Function
- In change status, we pass an array index and current status as a parameter.
- Then check if the array’s length exceeds the index’s value.
- Then get the element in the obj variable by index. And checks obj is not null or undefined.
- If obj has value, then update the value of IsCompleted property. And re-assign the object in an array at the same index.
- Lastly, call the save function to update data in local storage.
ChangeStatus(index: number, currentValue: boolean) {
  if (this.list.length > index) {
    let obj = this.list[index];
    if (obj != null && typeof obj != "undefined") {
      obj.IsComplete = !currentValue;
      this.list[index] = obj;
      this.Save();
    }
  }
}
Design Part
- As you can see in the below code snippet, there is an input box that is used to get input from the user’s side and bind it with task property using ngModel
- Then there are two buttons, one for Add a new task and the second for Delete All Task.
- Below this input box, there is a loop iterating the task list. Inside this div, there is one button for deleting a task by its index and one checkbox for changing the task status.
- The label of this checkbox is shown based on the condition. If the task is completed, then the label shows with a strikethrough otherwise show a simple text label.
app.component.html
<div class="row m-3">
  <div class="col-6">
    <input type="text" class="form-control" placeholder="Enter Task" [(ngModel)]="task" />
  </div>
  <div class="col-1">
    <button class="btn btn-primary" (click)="Add()">Add</button>
  </div>
  <div class="col-2">
    <button class="btn btn-danger" (click)="DeleteAll()">Delete All</button>
  </div>
</div>
<div class="row m-3" *ngFor="let item of list; let i=index">
  <div class="col-1">
    <button class="btn btn-danger btn-sm pull-right" (click)="Delete(i)">Delete</button>
  </div>
  <div class="col-5">
    <div class="form-check my-1">
      <input class="form-check-input" (change)="ChangeStatus(i,item.IsComplete)" type="checkbox"
        [checked]="item.IsComplete" id="{{i}}">
      <label class="form-check-label" for="{{i}}" *ngIf="item.IsComplete">
        <s>{{item.TaskName}}</s>
      </label>
      <label class="form-check-label" for="{{i}}" *ngIf="!item.IsComplete">
        {{item.TaskName}}
      </label>
    </div>
  </div>
</div>
app.component.ts
import { Component, OnInit } from '@angular/core';
@Component({
  selector: 'app-root',
  templateUrl: './app.component.html',
  styleUrls: ['./app.component.css']
})
export class AppComponent implements OnInit {
  list: any = []
  task: string = "";
  ngOnInit(): void {
    this.GetAll();
  }
  Add() {
    let obj = {
      TaskName: this.task,
      IsComplete: false
    };
    this.list.push(obj);
    this.Save();
    this.task = '';
  }
  ChangeStatus(index: number, currentValue: boolean) {
    if (this.list.length > index) {
      let obj = this.list[index];
      if (obj != null && typeof obj != "undefined") {
        obj.IsComplete = !currentValue;
        this.list[index] = obj;
        this.Save();
      }
    }
  }
  Delete(index: number) {
    if (this.list.length > index) {
      this.list.splice(index, 1);
      this.Save();
    }
  }
  DeleteAll() {
    this.list = [];
    this.Save();
  }
  Save() {
    localStorage.setItem("todo", JSON.stringify(this.list));
  }
  GetAll() {
    let value = localStorage.getItem("todo");
    if (value != '' && value != null && typeof value != "undefined") {
      this.list = JSON.parse(value!);
    }
  }
}
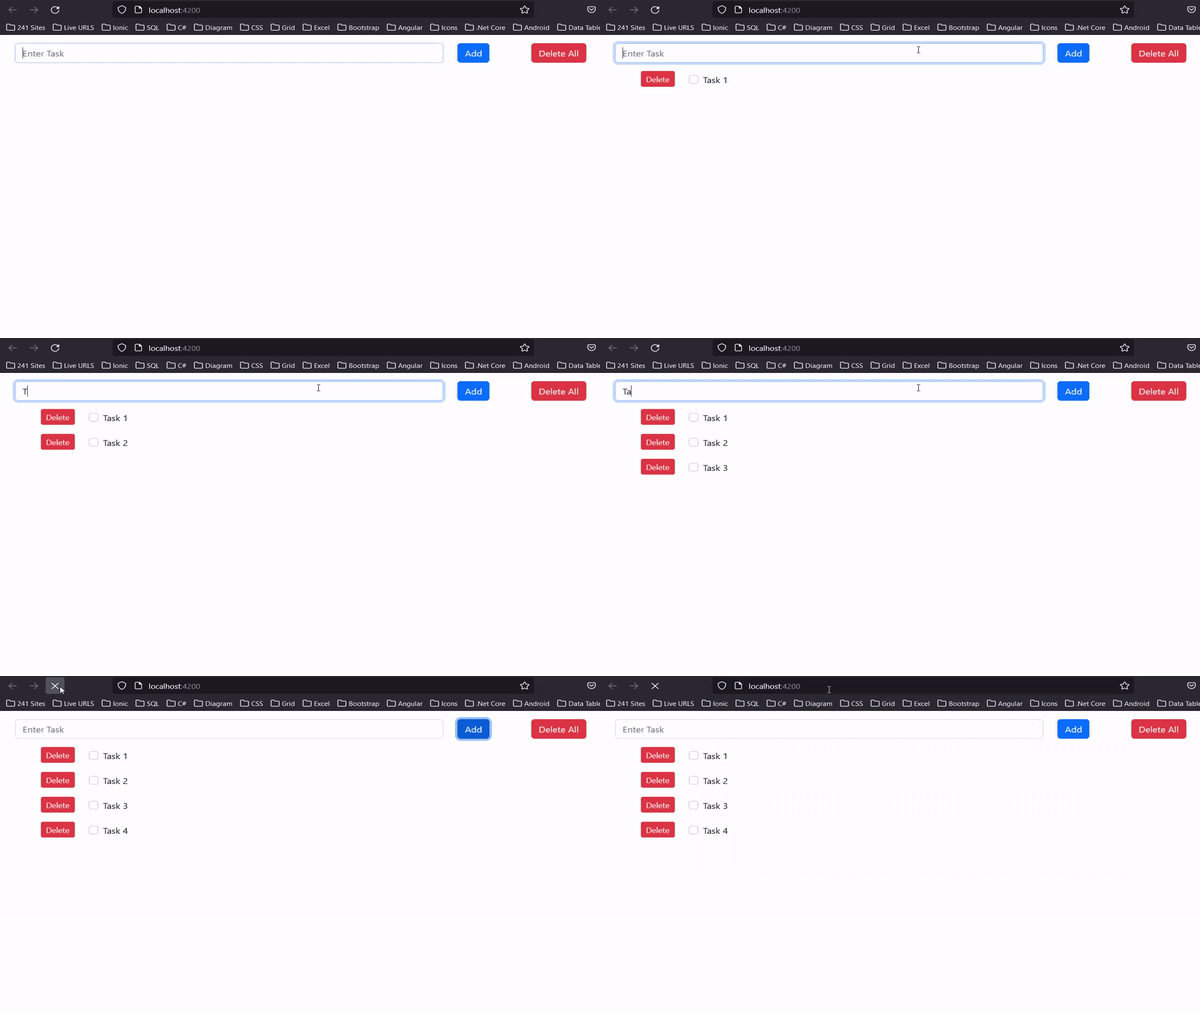
Add Task

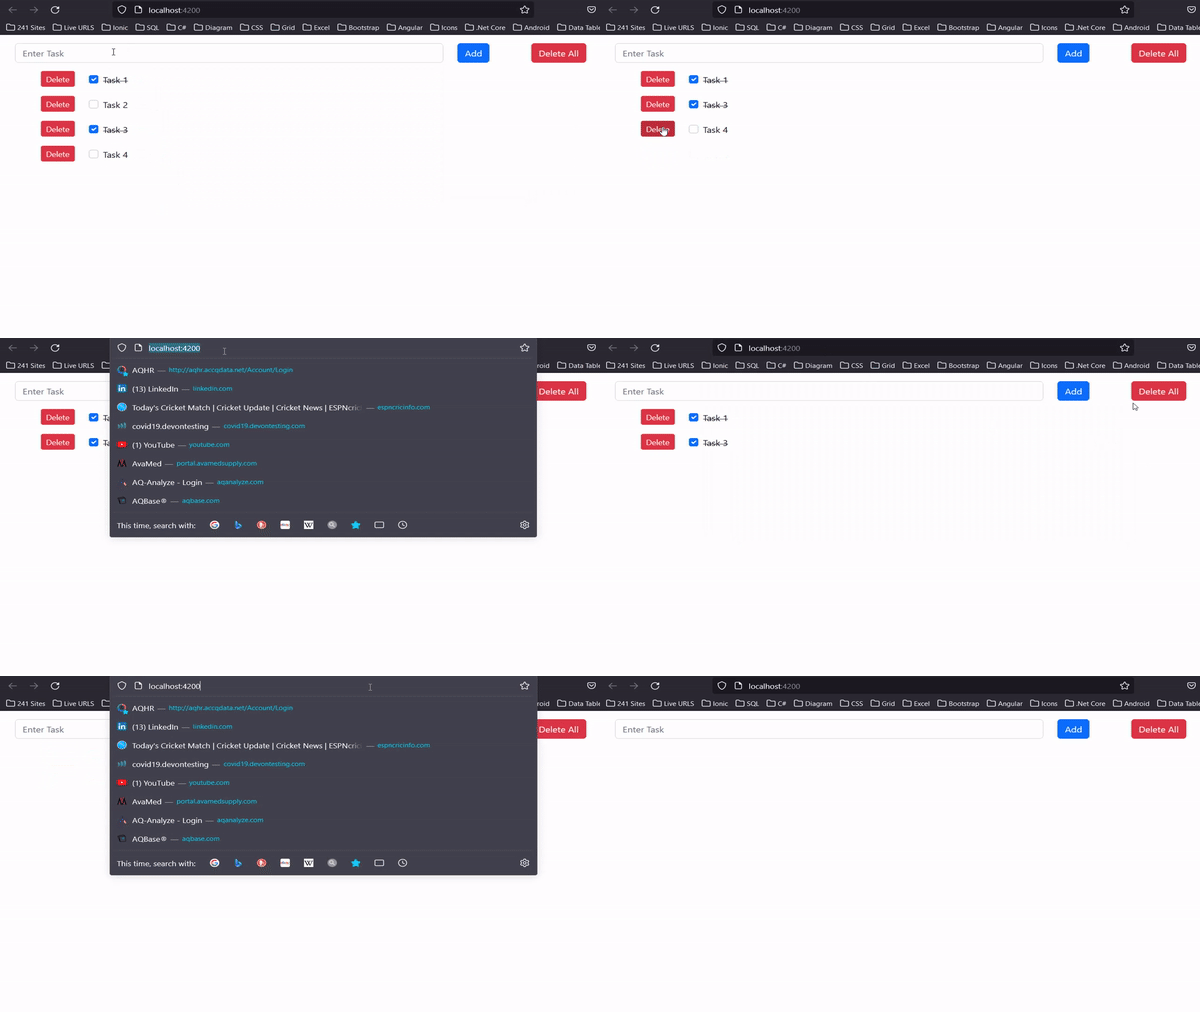
Change Status of Task

Delete Task

You can download the source code of this project from my GitHub.
